Explore light with these easy hands on activities for kids to explore colors, rainbows, and more!
Thank you for visiting. This post may contain affiliate links to recommended products at no extra cost to you. Read our Disclosures and Terms of Use. Don't miss out again, become a Reader here <--it's FREE.
The first thing I do when I notice raindrops on a sunny day is look to the sky for a rainbow. If the kids and I spot one we usually have what feels like only mere seconds to observe it before it disappears. We never get the chance to fully admire them and we definitely never get close enough to touch one (wink, wink). To help answer my kid’s questions, today’s activity is all about finding easy ways to explore rainbows, lights, and color with the kids in a hands on Science Activity.
Light is fun for kids to explore because it is something we can see, but we can’t touch breaking a lot of norms they are used to experiencing. Here is a wonderful resource on Facts about Color and this Grow a Rainbow science experiment will amaze the kids with more colorful learning and exploration!
Exploring Rainbows, Lights, and Color with Kids
More Rainbow Activities: Rainbow Letter Match Printable, Rainbow Sensory Bin, Paper Plate Rainbow Craft
Suggested Books:
 What Makes a Rainbow?-affiliate link (This book is so fun with ribbons that make a rainbow)

![]() Rainbows Never End: and other fun facts (Did You Know?)-affiliate link
Rainbows Never End: and other fun facts (Did You Know?)-affiliate link![]()

![]() The Magic School Bus Makes A Rainbow: A Book About Color (Magic School Bus)-affiliate link
The Magic School Bus Makes A Rainbow: A Book About Color (Magic School Bus)-affiliate link
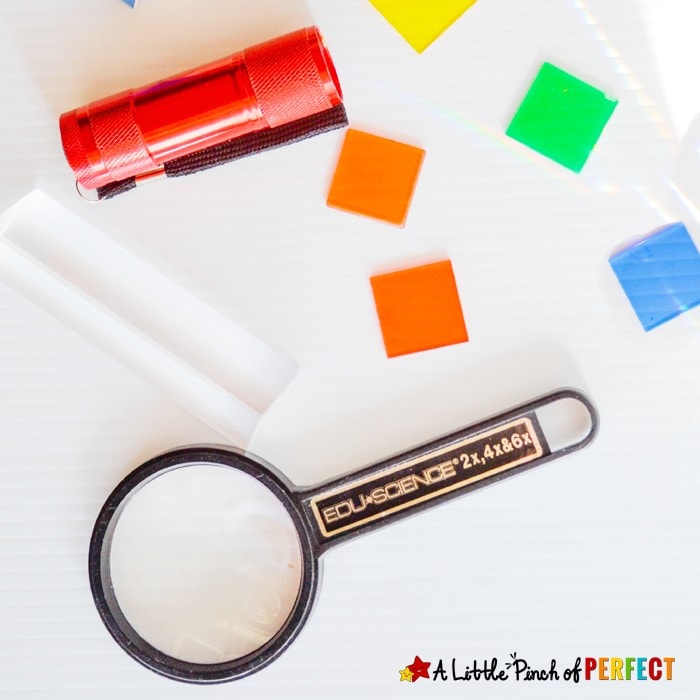
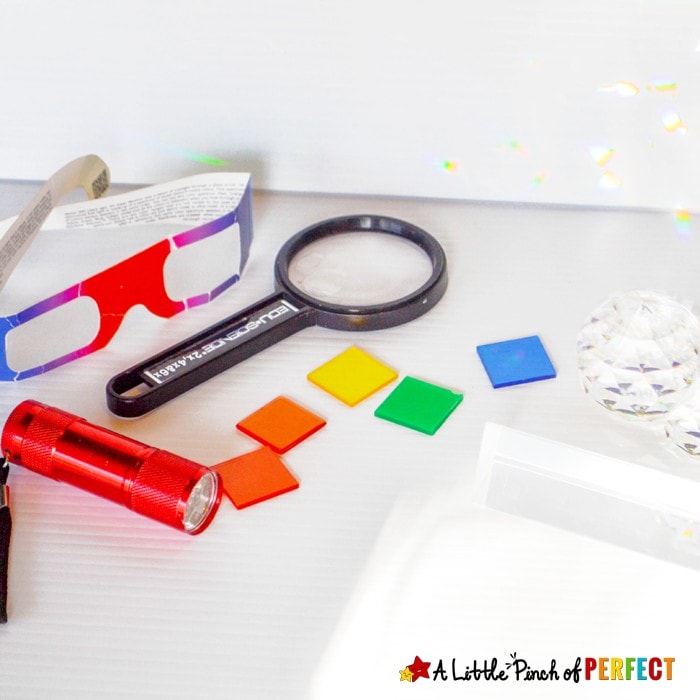
Suggested Supplies:
Flashlight
Mirror
Diffraction Rainbow Glasses-affiliate link (My kids play with these all the time. They make all light look like a rainbow).
Translucent Colored Shapes-affiliate link (perfect for light table play too)
Old CD
Magnify glass
Directions:
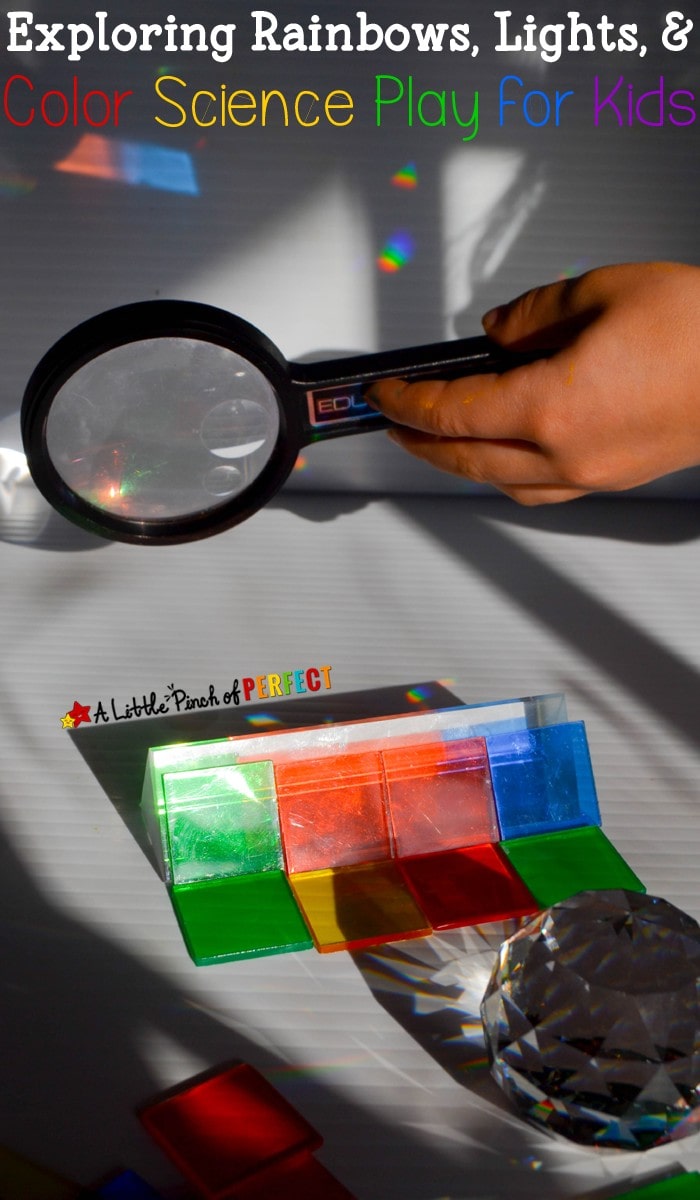
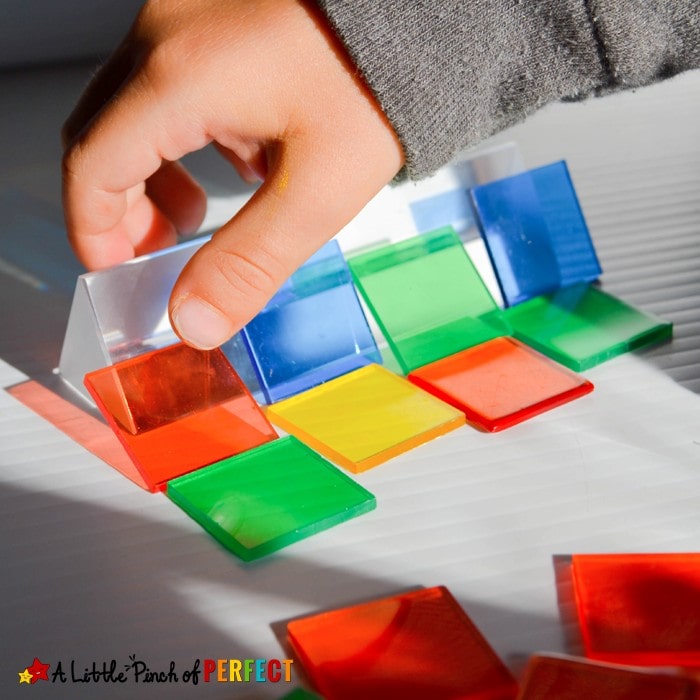
In short (and plenty of information for my little kids) rainbows appear in the sky because water refracts (bends) sunlight resulting in a spectrum of colorful light. For this activity we used prisms to bend light instead of water, but an old CD can make rainbows too. Since CD’s don’t look anything like a raindrop we used prisms to help make the connection between the prism and a raindrop more clear.

This activity was really self-guided. I showed the kids how to move the prisms in the sunlight and how to shine the flashlight on them and they set off to explore. First thing they did was try to catch the rainbows that were all over the walls thanks to our round prism (you can find them on online but I didn’t feel confident recommending a certain one because we already had ours). They noticed that they could see the rainbow on their hand but they couldn’t feel it. Next they took our translucent colored squares and set them on the prism which changed the color of the light. One of their favorite discoveries was using the magnify glass to refract the light inward making a brighter concentrated area of light. They were hoping to burn something with it but the light through the window was not hot enough (thank goodness crazy kids!–so if you are outside do make sure children are safe and not burning things or themselves.)
They also walked around the house with their diffraction rainbow glasses that look funny on, but are so cool you don’t want to take them off because it fills the room with rainbows that only the glasses wearer can see.
We found our triangle prism worked best in the dark with a flashlight angled at the side which only made one rainbow unlike the round prism.
More Science Activities by the Creative Preschool Team:
Design a Glider (Free Printable Included!) by Pink Stripey Socks
15+ Easy Preschool Science Ideas
Thank you for linking up at “A Little Bird Told Me” Wednesday link party! You have been featured on Mama’s Happy Hive blog. 🙂
Hi Vanessa, Thanks so much for visiting and for the feature!!! <3