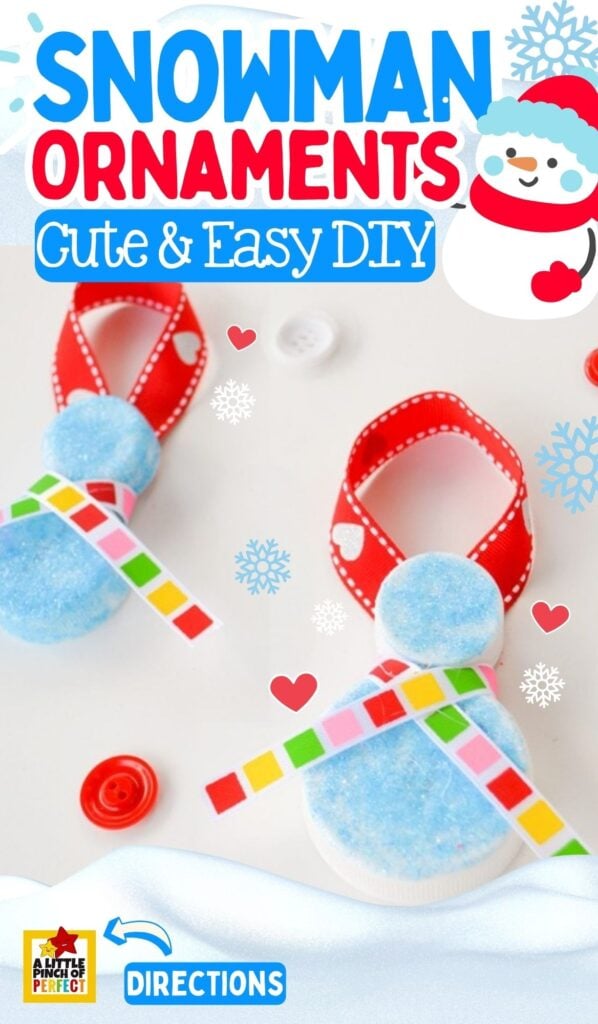
Learn how to make an ADORABLE snowman ornament with recycled milk lids for an INEXPENSIVE holiday craft for kids. They’ll look so CUTE hanging on your Christmas tree!
Thank you for visiting. This post may contain affiliate links to recommended products at no extra cost to you. Read our Disclosures and Terms of Use. Don't miss out again, become a Reader here <--it's FREE.
Recently we dug into our milk cap bag to make some snowman ornaments to hang on our Christmas tree. These ornaments are super easy to make and look adorable! I love using recyclables to make crafts like this Snowman Ornament because it teaches kids how to reuse items and it keeps the costs of the craft low.
See all our Christmas Ideas Here:
Make a Milk Cap Holly Ornament and a Snowflake Stick Craft to add more homemade ornaments to the tree! To decorate the house, here’s how to make a 4 x 4 snowman and to decorate the table, here’s how to make a Santa Charcuterie Board for kid-friendly holiday snacks!

I just counted the days until Christmas and noticed that I have more Christmas crafts than days left to share them. This means I am in scramble mode. Now that my Little Tiger and Little Dragon birthday party is over (which was a Frozen themed party see here on Instagram), I am setting to the busy task of getting as much as I can shared before Christmas. That way when Christmas is over I am not still sharing Christmas things (because that would be silly), and I can move on to new ideas like New Years, Winter, and… make sure to stay tuned. Okay, with all that said it’s time to get crafting!
Homemade Milk Cap Snowman Ornaments
Pin this idea to SAVE, SHARE, and MOTIVATE others to make them too!
Supplies:
- 1 White milk cap
- 1 White small cap (Like from a 2-liter bottle)
- Extra Fine Light Blue Glitter
- Paintbrush
- Mod Podge
- Hot glue gun and glue (for adults to use)
- Christmas Ribbon
Directions:
For your convenience, Printable Directions are available at the end of this post.
Step 1: Make the Snowman Glittery
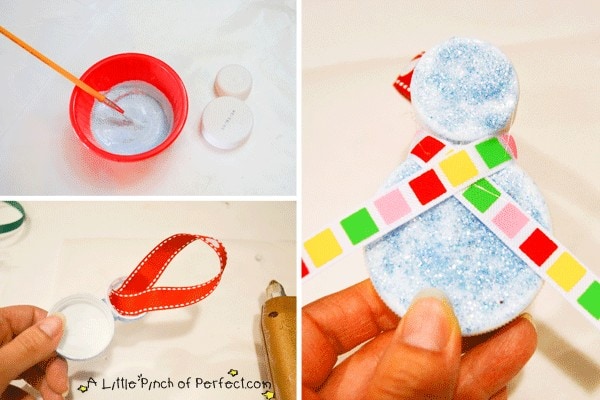
Mix a small amount of Mod Podge with blue glitter together and paint it on the milk caps. You need two milk caps per snowman craft, 1 large lid for the body and 1 small lid for the head. You may need to do a few layers to make sure your ornament is extra glittery.
Step 2: Build the Snowman
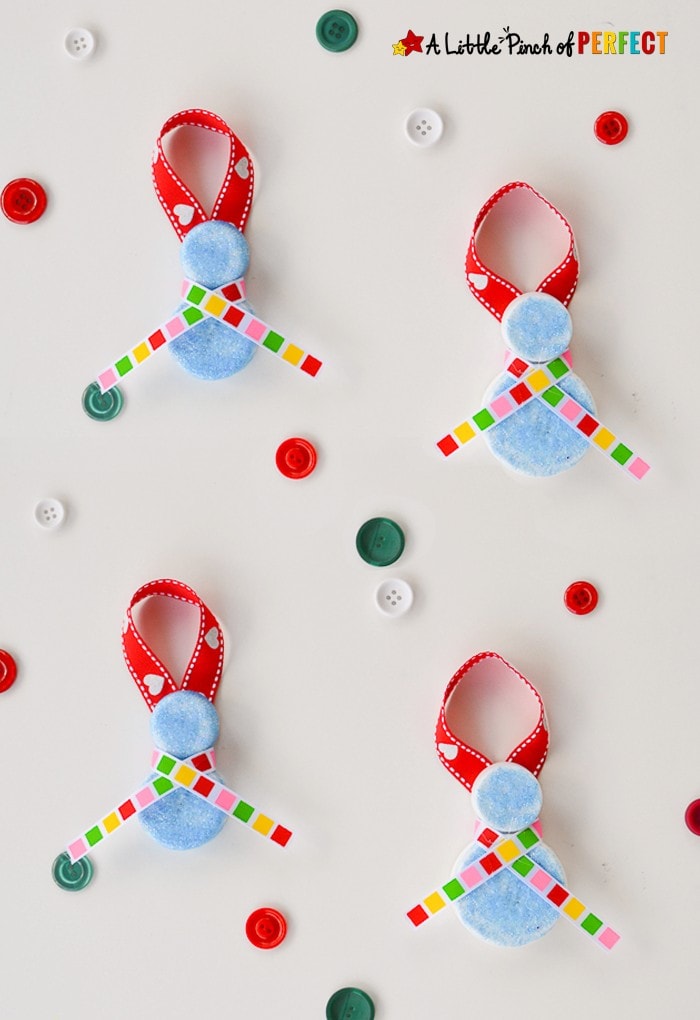
Once the Mod Podge dries, use your hot glue gun to glue the milk caps together (parent step). Then wrap a piece of ribbon around the neck of the snowman, and glue it in place.
Step 3: Make the Snowman an Ornament
Make a loop of ribbon and hot glue it to the back of the snowman’s head.
Optional:
- Use black puffy paint or googly eyes to make eyes.
- Glue on tiny buttons on the body.
- Glue a small triangle on the face for a nose.
Enjoying this post? Be sure to join our e-mail subscribers: Click Here for More Information
Print the Directions Here

Homemade Milk Cap Snowman Ornaments: Christmas Kids Craft
Materials
- 1 White milk cap
- 1 White small cap (Like from a 2-liter bottle)
- Extra Fine Light Blue Glitter
- Paintbrush
- Mod Podge
- Hot glue gun and glue (for adults to use)
- Christmas Ribbon
Instructions
Step 1: Make the Snowman Glittery
- Mix a small amount of Mod Podge with blue glitter together and paint it on the milk caps. You need two milk caps per snowman craft, 1 large lid for the body and 1 small lid for the head. You may need to do a few layers to make sure your ornament is extra glittery.
Step 2: Build the Snowman
- Once the Mod Podge dries, use your hot glue gun to glue the milk caps together (parent step). Then wrap a piece of ribbon around the neck of the snowman, and glue it in place.
Step 3: Make the Snowman an Ornament
- Make a loop of ribbon and hot glue it to the back of the snowman's head.
Optional:
- Use black puffy paint or googly eyes to make eyes. Glue on tiny buttons on the body.Glue a small triangle on the face for a nose.
See More: Christmas Crafts & Activities
- 20 of the Cutest Handprint Christmas Crafts
- Printable Christmas Advent Calendar
- 35 Easy and Cute Holiday Treats


One comment