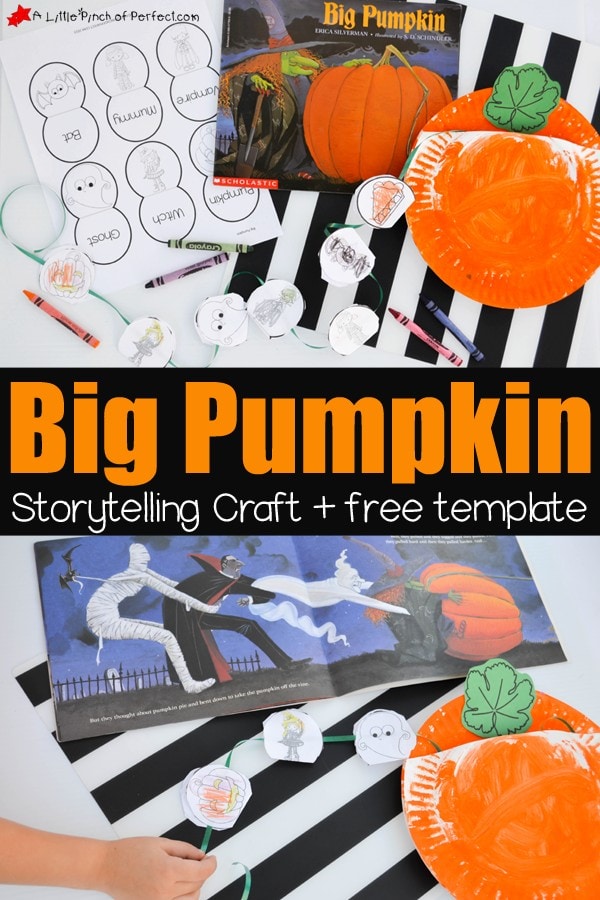
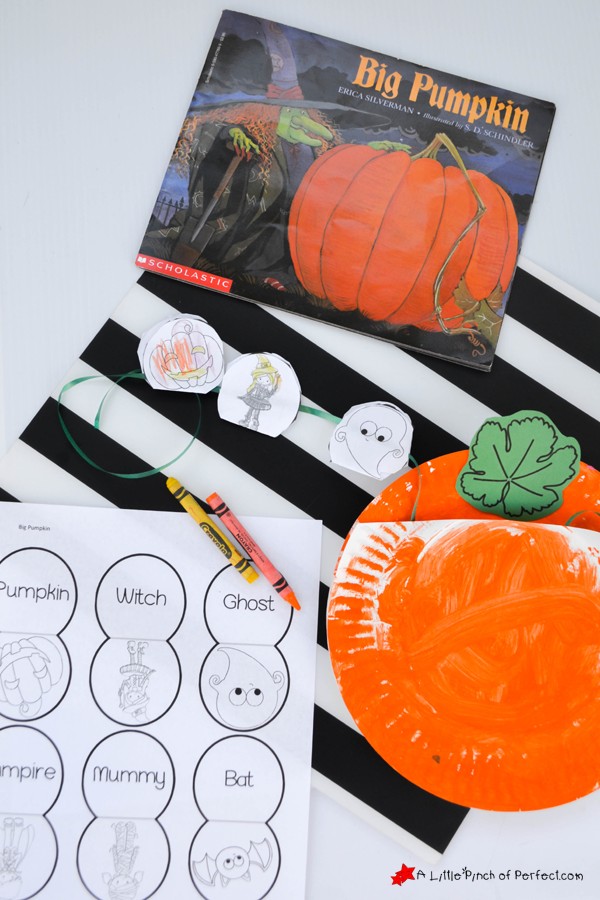
Big Pumpkin by Erica Silverman is one of our favorite Halloween Books that is fun to read and teaches kids about teamwork. To go along with the book we made a pumpkin paper plate craft, colored a witch, ghost, vampire, mummy, and bat, then put them in sequential order and tucked them inside our pumpkin. The characters in the book are constantly pulling on the pumpkin and as the kids retell the story they can pull out each character from the book to make story time extra fun!
Thank you for visiting. This post may contain affiliate links to recommended products at no extra cost to you. Read our Disclosures and Terms of Use. Don't miss out again, become a Reader here <--it's FREE.

If you haven’t read Big Pumpkin (affiliate link) you totally should, especially if you like making up voices while you read…my favorite is reading in a pretend vampire voice! The book has rhythmic repeating text that is catchy and the story will have your kids intently listening to find out if the pumpkin will be picked in time for Halloween.
This craft was inspired by the Pumpkin Life Cycle Craft I found on Kids Activities Blog. We made their life cycle craft along with our Big Pumpkin craft and I have to say, it’s a great way to learn about pumpkins! You can find the printable they used here.
Big Pumpkin Halloween Paper Plate Craft
 |
| Pin me please! 🙂 |
Supplies:
Orange craft paint
Paint brushes
Scissors
Glue
Green ribbon (affiliate link)![]() , string, or yarn
, string, or yarn
Paper plates (2 per pumpkin)
Crayons or markers
Green craft paper
Tape
Big Pumpkin Leaf printable (available to download for free at the end of this post)
Directions:
1. Have child paint the top of one paper plate and the bottom of a second paper plate orange and set aside to dry.

2. Have child color the characters on the printable, cut them out (along the outside only, the gray line is for folding not cutting), line them up according to the story (pumpkin, witch, ghost, vampire, mummy, bat, pumpkin pie), fold them in half, and glue them to a piece of ribbon.

3. Print the pumpkin stems on green paper and have child cut them out. They are a bit bumpy so I drew a rounded line around the leaf for Little Tiger to follow to make it easier to cut.
3. Find the paper plate that is orange on the bottom and cut off the top. Tape the ribbon to the unpainted side of the paper plate. Glue it to the top of the second orange plate and your done!

 |
| Pin me please! 🙂 |
DOWNLOAD THE PRINTABLE HERE:
Don’t see the box? CLICK HERE to be directed to the download. Please share and pin our printable 🙂
Graphics by Prettygrafik.com. While you are here, take a look more of our Free Printables.
PRINT THE DIRECTIONS HERE:
Big Pumpkin Storytelling Paper Plate Craft
Materials
- Orange craft paint
- Paint brushes
- Scissors
- Glue
- Green ribbon (affiliate link), string, or yarn
- Paper plates (2 per pumpkin)
- Crayons or markers
- Green craft paper
- Tape
- Big Pumpkin Printable
Instructions
- Have child paint the top of one paper plate and the bottom of a second paper plate orange and set aside to dry.
- Have child color the characters on the printable, cut them out (along the outside only, the gray line is for folding not cutting), line them up according to the story (pumpkin, witch, ghost, vampire, mummy, bat, pumpkin pie), fold them in half, and glue them to a piece of ribbon. The Printable is available here: https://alittlepinchofperfect.com/big-pumpkin-halloween-paper-plate-craf/
- Print the pumpkin stems on green paper and have child cut them out.
- Find the paper plate that is orange on the bottom and cut off the top. Tape the ribbon to the unpainted side of the paper plate. Glue it to the top of the second orange plate and your done!


One comment