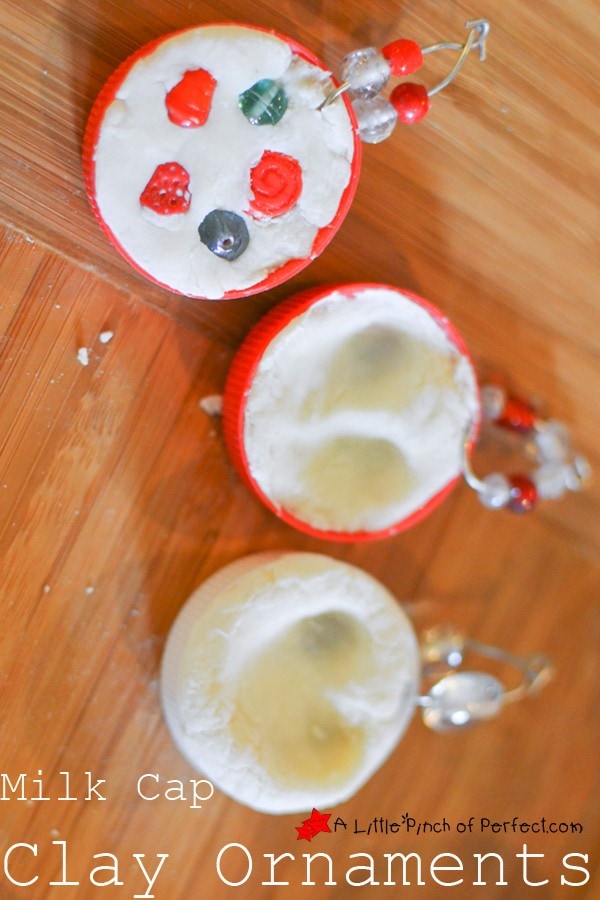
Turn everyday milk caps into adorable clay ornaments with this fun flower pot decoration craft for kids! A perfect hands-on activity for spring, gardening, or Mother’s Day.
Thank you for visiting. This post may contain affiliate links to recommended products at no extra cost to you. Read our Disclosures and Terms of Use. Don't miss out again, become a Reader here <--it's FREE.
With Mother’s Day right around the corner and spring flowers bursting into bloom, these adorable little clay ornaments are the perfect way to add a personalized touch to any flower pot. Whether you’re crafting for moms, grandmas, or just to celebrate the season, these handmade decorations bring charm and heart to any garden or flower pot. They’re small enough for little hands to create, yet meaningful enough to become keepsakes that loved ones will cherish year after year.
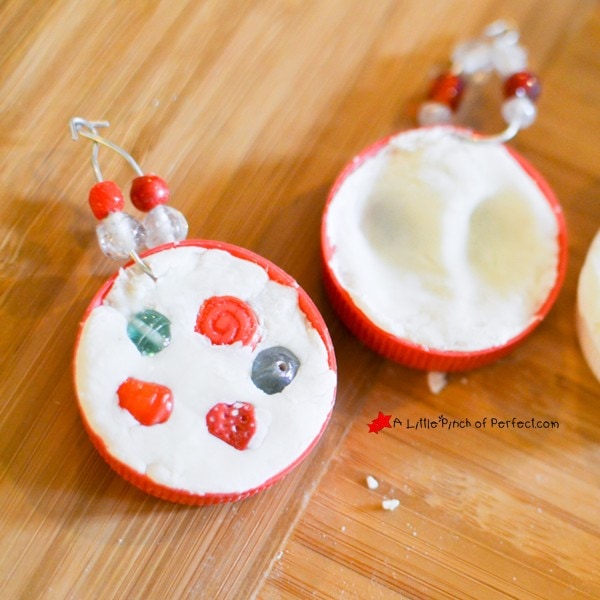
Kids can get creative by designing fun patterns or pressing their little fingers into the clay for a sweet fingerprint impression—every mom and grandma’s favorite kind of keepsake!
In today’s post, I’ve included an easy homemade clay recipe so you can skip the store-bought stuff. Just grab some milk caps from the recycle bin, mix up your dough, and follow along.

Crafting with Milk Caps
We used a milk cap as the base of our ornament to give it extra durability, making it strong enough to hang or display without bending or breaking. The round shape creates a perfect frame for the clay design and gives the ornament a polished look from both the front and the back—no messy sides here! Plus, we always seem to have bags full of plastic lids waiting to be reused, so finding a fun and creative way to turn them into a recycled craft is a win. This project could be used as a great hands-on activity for Earth Day, giving little ones a chance to celebrate the planet while creating something beautiful from items that might otherwise end up in the trash.
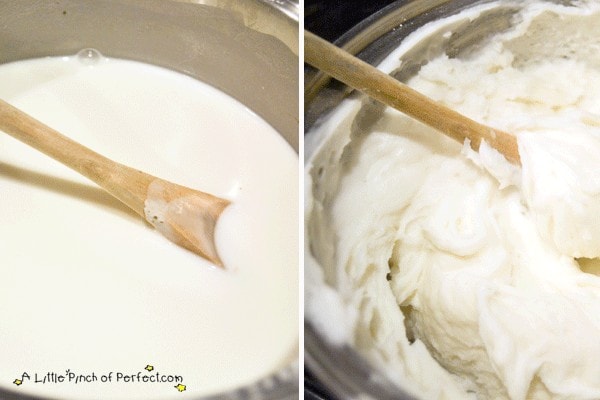
Homemade Clay Recipe
Ingredients:
- 1 C. cornstarch
- 2 C. baking soda
- 1 1/2 C. cold water
Clay Recipe Directions
Mix the ingredients together over medium heat. Stir continually, it will get really thick and hard to stir. Once it reaches desired consistency, remove from pan and let cool before playing with it. Store in an air tight container.
Milk Cap Clay Ornaments
Supplies
- Craft wire or pipe cleaner (We used aluminum craft wire)
- Knife
- Milk cap
- Beads (optional)
- Paint (optional)
Directions:
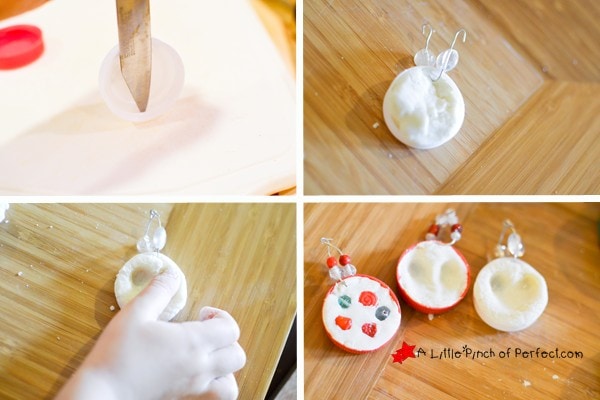
1. Carefully use the knife to poke a hole in the side of the milk lid.
2. Cut a piece of wire and thread it through the hole in the milk cap, add beads to the wire (optional), make two hooks at the end of the wire and connect them together.
3. Smash some clay into the lid and design as you would like. We used our thumbprints to make hearts (my favorite!) We also pressed beads into the clay/ Let the ornament dry. Kid’s can use the craft paint to continue decorating their ornament if they think it needs more color.
These are so cute! Thanks for sharing with the Frugal Family linky.