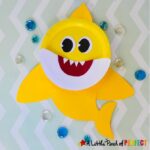
Baby Shark Paper Plate Kids Craft and Free Template
Children can make a Paper Plate Shark inspired by Baby Shark, with our free craft template and easy step-by-step directions.
Instructions
- Body and Fins printed on colored paperTeeth-printed on white paperEye-printed on white paperMouth-red paperHave your child select what color shark they want to make. Give them a matching paper plate and shark template. When we do crafts that the kids are going to glue I like using colored cardstock because it withstands any amount of glue and the colors are generally brighter (making a prettier craft).Cut out the eyes, mouth, and teeth. Have your child glue them to their paper plate to make the face. Each shark should have a toothy smile. Grandma, Grandpa, and Baby shark are missing teeth from the bottom, but your child can choose to decorate their shark with as many or as little teeth as they want. They will know when their shark has the "Perfect Smile."Now it's time to add the fins and body. Cut the fin and body template out. Glue the top fin to the back of the paper plate at the top.Glue the body to the back of the bottom part of the paper plate.Glue the fins to the back of the body. One fin goes on the left side and one fin goes on the right side. Once the glue is dry, baby shark is ready for any ocean adventure or singing time!