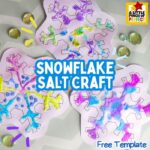
Salt Snowflake Winter Craft
Use the template to make a 3D snowflake with glue, salt, and watercolors.
Materials
- White glue
- Table salt
- Watercolor paints
- Paintbrushes
- Free snowflake template
- Thick cardstock paper
Instructions
- Print the Template: Download and print the free snowflake template onto your cardstock paper. This will ensure your snowflake design stays sturdy throughout the process. If desired, lightly trace the snowflake design with a pencil to make it more visible.Glue Application: Use white glue to trace the snowflake design on the template. Squeeze white glue along the lines of the snowflake design. Be generous with the glue, but avoid creating large puddles.Sprinkle Salt: While the glue is still wet, generously sprinkle salt over the entire snowflake design. Make sure all the glue is covered with salt. Gently shake off any excess salt onto your tray or plate.Paint the Salt: Once the salt is dry, use your watercolor paints and a paintbrush to carefully add color to the salt. The salt will absorb the paint and create a beautiful, textured effect. Experiment with different colors and techniques to achieve your desired look.Let it Dry: Let the watercolor paint dry completely. Then, carefully cut out the snowflake shape using scissors. Your creation is now ready to display as winter décor or use in a winter-themed craft project!
Notes
- Salt Type: Use fine-grained table salt for the best results.
- Glue Consistency: If your glue is too thick, add a few drops of water to thin it out.
- Watercolor Application: Use a light touch when applying the watercolor paint to avoid dissolving the salt. Start with a small amount of paint and gradually add more as needed.
- Color Blending: To create a blended effect, wet the salt with a clean, damp paintbrush before applying the watercolor paint.
- Glitter: Add a touch of sparkle by mixing glitter with the salt before applying it to the glue.
- Preservation: To protect your finished snowflakes, spray them with a clear acrylic sealant.