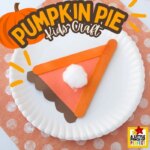
Pumpkin Pie Craft for Kids
This Pumpkin Pie Craft is perfect for a Thanksgiving table decoration, a classroom art project, or a fun activity on a chilly autumn day
Materials
- 2 Wooden Popsicle Sticks: You can use colored ones to skip painting.
- Orange Craft Paint and Paintbrush: To make the “pie” look perfectly pumpkin.
- Brown and Orange Craft Paper: For the pie filling and crust.
- White Cotton Ball: Perfect for the “whipped cream” topping.
- Paper Plate (optional): Adds a finishing touch and makes the craft look like a slice on a plate.
- Glue and Scissors: For assembly.
Instructions
- Prep and Paint the Popsicle Sticks:Start by painting the two wooden popsicle sticks orange. This step is a lot of fun for kids because they get to watch their plain sticks transform into something colorful! If you’re in a hurry or working with a larger group, you can always use pre-colored popsicle sticks.Glue Popsicle Sticks into a V-Shape:Once the paint dries, glue the popsicle sticks into a V shape. This is the base that’ll hold your “pumpkin pie filling.” Make sure the sticks are glued firmly so they stay in place during the rest of the crafting.Create the Pumpkin Pie Filling:Using your orange craft paper, cut out a triangle that fits neatly inside the V shape made by the popsicle sticks. This orange triangle is your “pie filling.” Kids can even add texture by using crayons or markers to give it a realistic pie-like look!Make the Crust:Next, grab your brown craft paper and cut out another triangle, slightly larger than the orange one. Use scissors to scallop the edge, creating that classic, crimped crust look. This simple detail makes a big difference in making the craft look like a real pumpkin pie slice.Assemble the Pie:Glue the orange triangle (pie filling) and brown triangle (crust) to the back of the V shape made by the popsicle sticks. Once it’s all glued together, you’ll see the pumpkin pie slice really taking shape. Little kids especially love seeing their pie come together at this stage.Add Whipped Cream:What’s a pumpkin pie without whipped cream? Glue a cotton ball to the top of the orange triangle to mimic whipped cream. This little touch adds a soft, 3D element that really makes the craft stand out.Optional Step: Add a Paper PlateFor an extra festive touch, you can glue the pumpkin pie slice onto a small paper plate. This makes it look like a piece ready to be served and can also help your child’s pie craft stand upright if you want to display it.
Notes
- Textured Crust: For a realistic touch, use textured paper or crimp the brown craft paper even more to resemble a freshly baked crust.
- Scented Craft: Add a light dusting of pumpkin spice or cinnamon on the pie filling for a fun, scented twist.
- Personalized Touch: Let kids write their names on the back or add a little Thanksgiving message like “Thankful for Family.”