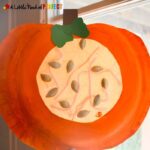
How to Make a What's Inside a Pumpkin Craft
Create a fun pumpkin craft that lets kids explore what the inside of a pumpkin looks and feels like using seeds, yarn, and tissue paper.
Materials
- Orange Tissue Paper
- Paper Plates (We used the nice paper plates that hold shape for this craft, and saved our flimsy paper plates for later)
- Orange paint
- Clear Contact Paper
- Scissors
- Pumpkin seeds (raw, clean and dry)
- Pieces of yarn
- Green and brown craft paper
- Tape or stapler
Instructions
- Cut out the center of the paper plate. Then, trim the top and bottom to create a pumpkin shape.Have your child paint the back of the paper plate orange, then set it aside to dry completely.Cut a piece of contact paper large enough to cover the opening. Keep the backing on for now. Place the paper plate on the table with the painted side facing down. Position the contact paper inside the paper plate with the sticky side facing up. Remove the backing, then secure the contact paper around the edges with tape or a stapler.Have your child stick pumpkin seeds onto the contact paper.Have your child add pieces of yarn to the contact paper to create the fibrous strands found inside a pumpkin.Have your child place a piece of orange tissue paper over the seeds and yarn to secure them in place.Have your child cut a stem from brown paper and a leaf from green paper. Attach them to the top of the pumpkin using tape or a stapler.
Notes
Tips & Variations
- Use real pumpkin seeds for a more realistic pumpkin activity.
- Let children compare the craft with a real pumpkin.
- Use different shades of orange tissue paper for added texture.
- Add green paper vines or leaves to decorate the pumpkin.
- For younger children, precut the pumpkin shape, stem, and leaf.