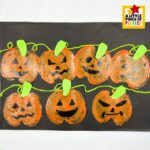
How to Make a Apple Stamping Jack-O’-Lantern Pumpkin Patch
Cut the Apple — Ask a grown-up to help cut the apple in half. Go ahead and pat the cut sides dry with a paper towel so the paint sticks nicely.Make the Vines — Using school glue, make the pumpkin vines by gluing green yarn. Press a length of green yarn along each glue line before it dries. This becomes the vine that holds your whole pumpkin patch together. We pressed ours down gently with our fingertips to make sure it stuck all the way across. Note: You may want to do this step after the pumpkins are stamped. Stamp the Pumpkins — Pour a little orange paint onto a plate, then press the flat side of your apple half into the paint and stamp it onto the black paper to make your pumpkins. Add as many as you like into your pumpkin patch. We made our pumpkin patch have two rows with seven pumpkins, but kids can stamp as many as they want — the more the merrier!Add the Stem and Leaves — Cut several stem and leaf shapes from the green paper, We cut ours into simple rounded teardrop shapes, but kids can make them as big or small as they like! Once the paint is dry, glue a green paper leaf to the top of the pumpkins or on the vine. This little touch really brings the pumpkin patch to life! Option: You can finish craft time here with a cute pumpkin patch for fall or continue to the next step for a Halloween twist. Draw the Jack-o'-Lantern Faces — Once the paint is dry it's time to give your pumpkins faces! Use a black permanent marker to draw a face on each pumpkin! Spooky, silly, happy, surprised — there isn't a wrong way to do it. We gave each of our pumpkins a totally different expression, and they turned out so cute all lined up together. Have fun making every face uniquely yours!
Try These Fun Variations
- Try using different shades of orange, yellow, or even purple paint to stamp a rainbow pumpkin patch — we used a deep burnt orange and a bright yellow-orange side by side, and the two-toned effect looked so fun! Kids can mix colors on a paper plate palette and experiment with what they get.
- Swap the black paper for white or kraft brown paper and see how the whole mood of the artwork changes! White paper gives it a softer, more daytime feel, while brown paper looks like it could be a page straight out of a cozy fall storybook.
- For a little extra texture, let kids press the apple stamp lightly a few times without re-loading it with paint — those faded, ghost-print pumpkins look amazing mixed in with the bright ones and make the patch feel extra full and layered.
- Older kids can cut their own leaves from the green paper and get creative with the shapes — long and pointy, round and fat, even curly if they snip little notches. We kept ours simple, but there really isn't a wrong way to make a pumpkin leaf!
- Instead of a Halloween jack-o'-lantern patch, skip the faces and use yellow or red paint to make a fall apple orchard scene — just add a simple tree trunk cut from brown paper and glue the apple stamps on as apples! It's a great way to get two different seasonal projects out of one simple technique.